Thursday, April 26, 2012

4/25/12 Exhaust System

It may not seem like I was able to get very much accomplished during the past few weeks. Actually, I'm trying to get the frame completed and painted. In order to accomplish this I need to install the entire front and rear suspensions, so I can roll the car into the exhaust shop. It is also necessary to install the brake booster, transmission cooler, transmission cooler lines, rear sway bar, gas tank, skid plate, and steering linkage.
The brake booster and master cylinder will be mounted beneath the floorboard and to have access to the brake fluid reservoir it was necessary to cut a access hole in the floor. I drilled three 1/8" holes to start. Two can be seen where the cleco are installed. The third hole is rather hard to see but it is in line with the cleco holes and to the immediate right of the wood template. The third hole will be the starting point for my plasma cutting torch.


Here is a picture of the access plate after cutting with the plasma torch and installing the mounting screws.


Now I can access the brake reservoir for fluid level.


Prior to loading my 33 into Walt's trailer, once again,  I drove by the DOT weigh station in Bonney Lake. As can be seen the trailer axles weigh 3700  lbs. This doesn't take into consideration the tongue weight of the trailer which generally is about 10% of the overall weight. Therefore, Walt, your trailer weighs about 4100 lbs, empty. A little heavier than I though, but not nearly too much for a "Duramax".   

After loading my car, I again drove by the DOT weigh scales. Now the trailer axles weigh 5950 lbs. Therefore my car weighs about 2475 lbs. if I was accurate on the placement of the car within the trailer. I'm going to estimate the final weigh of the car to be around 2700 lbs. Naturally, I'll be weighing the car after it's completed.

Here I'm at Mike Sader shop to have the exhaust installed. This shop doesn't look like much but Gary the guy who is going to install the exhaust has been doing this work for 40yrs. and is one of the best in the South Puget Sound area.


This picture shows the front part of the exhaust. There are three bolt flanges installed just prior to the mufflers.


There are three bolt flanges installed just after the bends going over the axle. With the addition of these three bolt flanges the entire exhaust system can be easily removed.

This is a 2.5" exhaust with Dynomax VT mufflers. These mufflers will reduce "drone" in highway speed. This is accomplished with a spring loaded valve within the muffler. This valve will be completely opened when there is higher pressures which allows the exhaust to essentially go straight thru the muffler. Under lower pressures the exhaust is directed thru the "quiet" area. Should be fun on the highway, in the event I have the opportunity to pass under full acceleration. 

For those who didn't make the correct guess. This is the transmission skid plate, inverted.

Wednesday, April 11, 2012

4/8/12 Completed???????

Well now, there are still a few folks that haven't submitted their guess for "What is it?" from the last post. You still have time to get your answers in prior to the big drawing. But, time is running out, and if you send your answers in right now, along with $19.95 I'll guarantee you will find out what it is, HURRY, TIME IS RUNNING OUT.


Well, it's Completed.................it's a ratrod. And you'all thought I was building something else?

Well, not really. I had to get some wheels and tires mounted that will allow me to roll the frame around since I'm getting ready to bring the car our and have the exhaust system installed. Once the exhaust is installed I can complete my frame, including paint.


This means the entire suspension system, transmission, engine, rear fenders, gas tank, brake booster and master cylinder, rear sway bar and trans cooler lines all have to be installed.


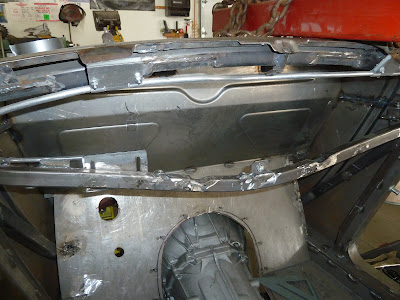
Looking at the size of the flange on the side of the gas tank I'd guess that I should be able to trim about 1/2" without any problem, right.


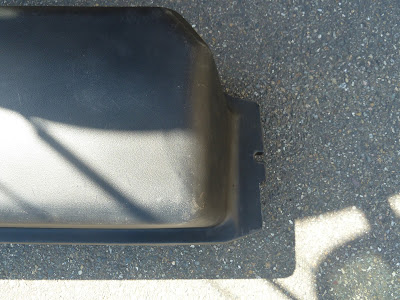
Here is a picture after I cut about 3/8". By removing this small section I'll be able to remove the gas tank from the frame without removing the steel gas tank cover. Being able to remove the tank directly out the bottom of the car will be a big deal years down the road.


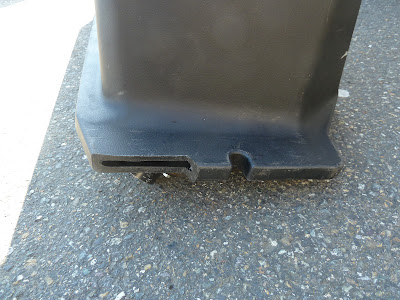
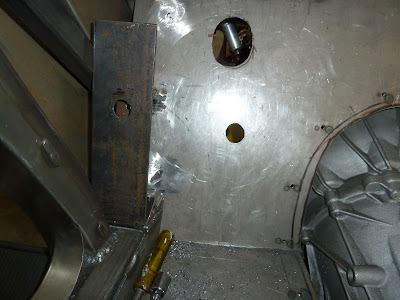
Well wrong on the idea of being able to trim the flange. There is a small section of the tank going out into the flange. Kinda crazy but it is what it is.


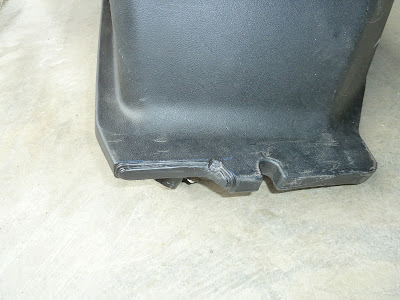
Here it is after having a patch welded over the opening. It needed to be done but a little disappointing to have to patch the tank. At least I now know who can weld polyethelene in the Tacoma area. I also was given some instruction on how it's done and a few samples of the plastic welding rod. Some day i'll give it a try.


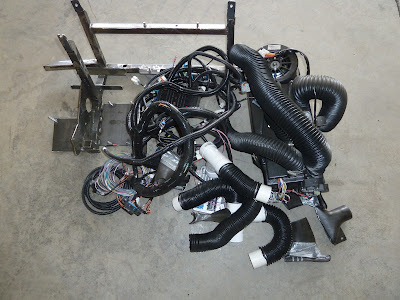
All of this will eventually be positioned under the dash. Just getting everything together.

Heater/defrost/AC, ducting, ECM, one wiring harness, and a frame to hold everything.


Here is a picture of where the dash will be attached. It probably doesn't make much sense from this picture but believe me, there is a lot going on in this area.


As in newer cars, where there is a pad for the drivers left foot,  this one will be adjustable in it's angle The pad gives a little more support to the driver when cornering exceed .8 g's, which should be possible with front and rear sway bars.